Welcome to STEMinism Sunday! As a former woman in science, I have a deep and enduring interest in the experiences and representation of women in STEM fields (science, technology, engineering, and math). This series will be an opportunity for me – and you – to learn more about these intellectual badasses.
A special treat today: an interview with illustrator June Steube! June’s specialty is science and nature illustration, and she’s worked for clients as diverse as Canada Post and the Canadian Museum of Nature. She’s currently illustrating her first children’s book, but she still found time to stop by and share some tips for anyone who wants to give their animal art a little more realism – not to mention personality!
What kind of research do you do to make sure your illustrations are scientifically accurate?
Usually, I begin with photo research using Google image search, books, and if possible, drawing and photographing a live animal or a specimen at a museum. I look up descriptions of the animals and their habits, noting especially what characteristics distinguish them from closely related species. When preparing illustrations for museums, I work closely with a scientific expert who will check the drawings for accuracy.
What steps do you normally follow when working on a new illustration?
For nature drawings that don’t require strict scientific accuracy, I’ll begin by sketching the animal in many poses from various angles. I look for dominant shapes that are pleasing and that portray certain characteristics — such as pointy, long and leggy, and I exaggerate those. I will usually see a touch of emotion in some of the sketches – such as shyness, grumpiness, curiosity, or joy and will push that feeling in the facial expression, pose, and viewpoint.
For my illustration work, I will further refine one of the drawings, scan it and use Photoshop for very small retouches such as the eyes, or at other times, for colouring the entire drawing. I ‘multiply’ the drawing in the layers palette then work on the colour in layers above and below the drawing. Some illustrations can have 3 layers and some detailed artwork with backgrounds can have as many as 40 layers or more.
How do you “fix” a drawing that doesn’t go the way you want it to?
I much prefer working in traditional media such as pastel or watercolour on paper or illustration board, but both the thrill of using that media and the drawback is, once you make a mark you usually can’t change it. I am not keen on using a computer but it allows me to do needed revisions and work faster.
I will usually redraw the revised section, scan it, and in Photoshop I will patch that portion over the area that needs to be altered. Sometimes it goes easily and other times a revision can be mind-numbing work that can go on for hours.
How do you give your animals movement and personality while still keeping them realistic?
I will add expressive eyes using the same techniques for facial expression that some animators use when they do character studies. The eyes will be more cartoonish and there may be added eyebrows. I may extend the mouth line into a smile or frown and may exaggerate features that I find comical, such as pouchy cheeks. Even the fur can express the personality with smooth fur showing a persnickety neatness and attention to detail or a wildly hirsute character carrying around its own population of fleas. The basic features can remain the same – a wolf can look like a wolf but you can choose to create a shy nervous wolf or a loud show-off wolf. I try not to overly sentimentalize animals but instead to create a moment of recognition.
Do you have any advice for kids who want to draw better birds?
Begin with basic shapes – a goose is like a wide bowling pin with a small head and triangular wings and a chickadee is a fat triangle with a circular head somewhat ‘set into’ the body. Look at the skeleton of a bird. When you draw a bird, imagine seeing through those feathers – where does the top of the bird’s legs meet the pelvis? Notice the backward bend at the ‘knee’ area before the leg meets the foot. Note the tail position and how the bird’s position affects where the legs and tail are — how they are both used as ballast to keep the bird from tipping over.
You can check out how I drew a Great Tit below, finishing with a grouped set of birds ready for my website portfolio or for sharing on social media. Why not try drawing your favourite bird using coloured pencils on paper or with your drawing app on a tablet?
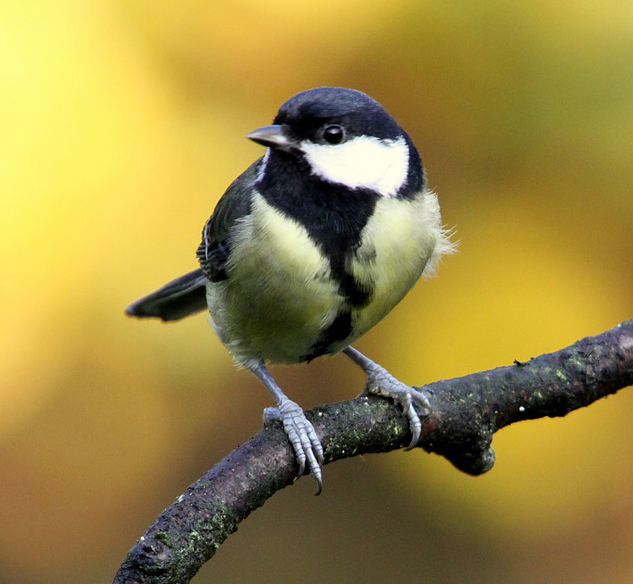
Reference photo of a Great Tit, courtesy of Pixabay.com
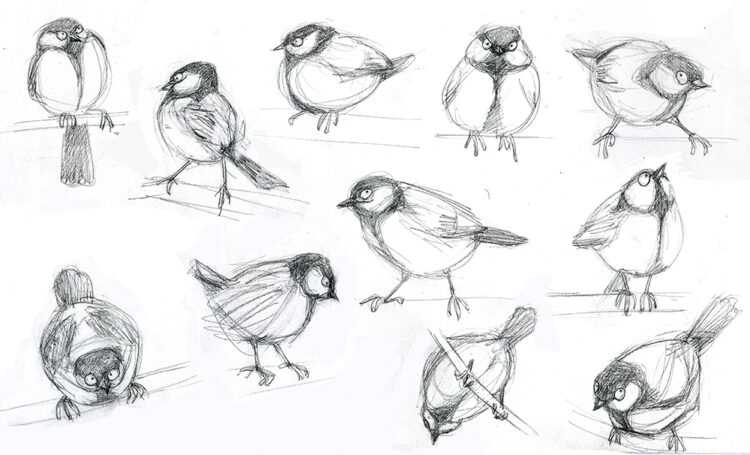
Initial Great Tit character studies
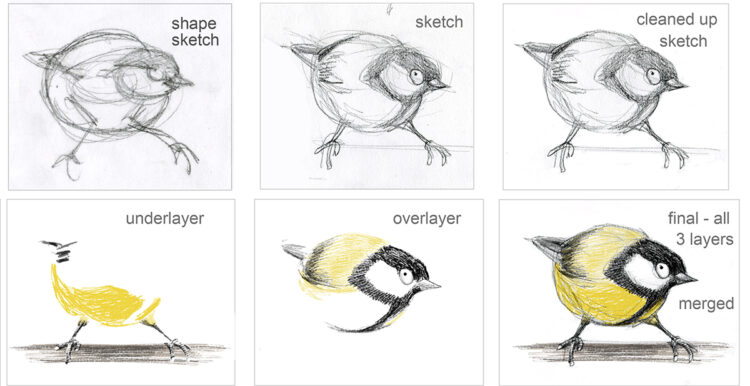
Taking one drawing from a sketch to full colour
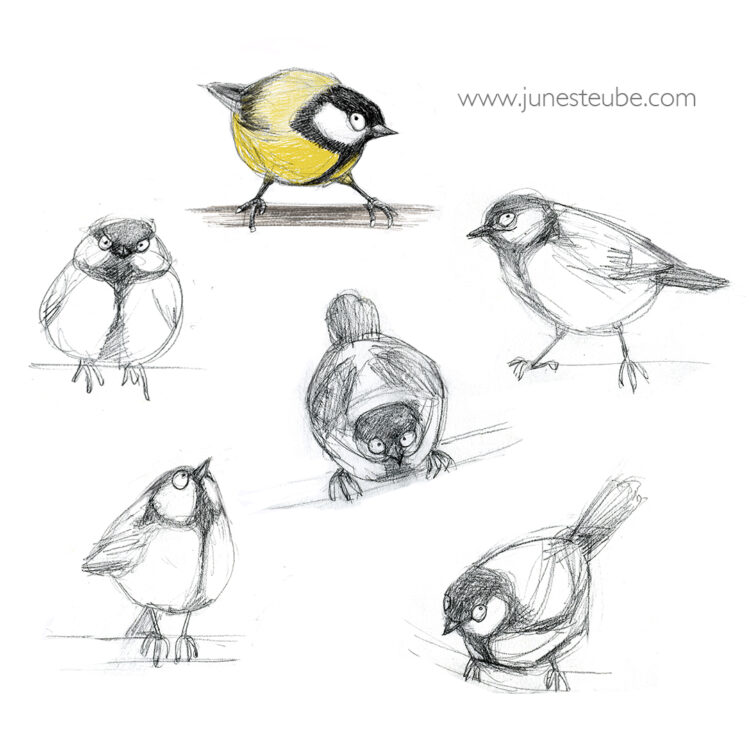
Final sketches arranged for social media